
How do you enhance the low resolution quality image to a high resolution image?
Have you ever had a great photo that looks tiny, blurry, or pixelated when you try to print or share it? You are not alone, and the good news is that you can often bring it back to life with smart upscaling tools and a clear look at the original file.
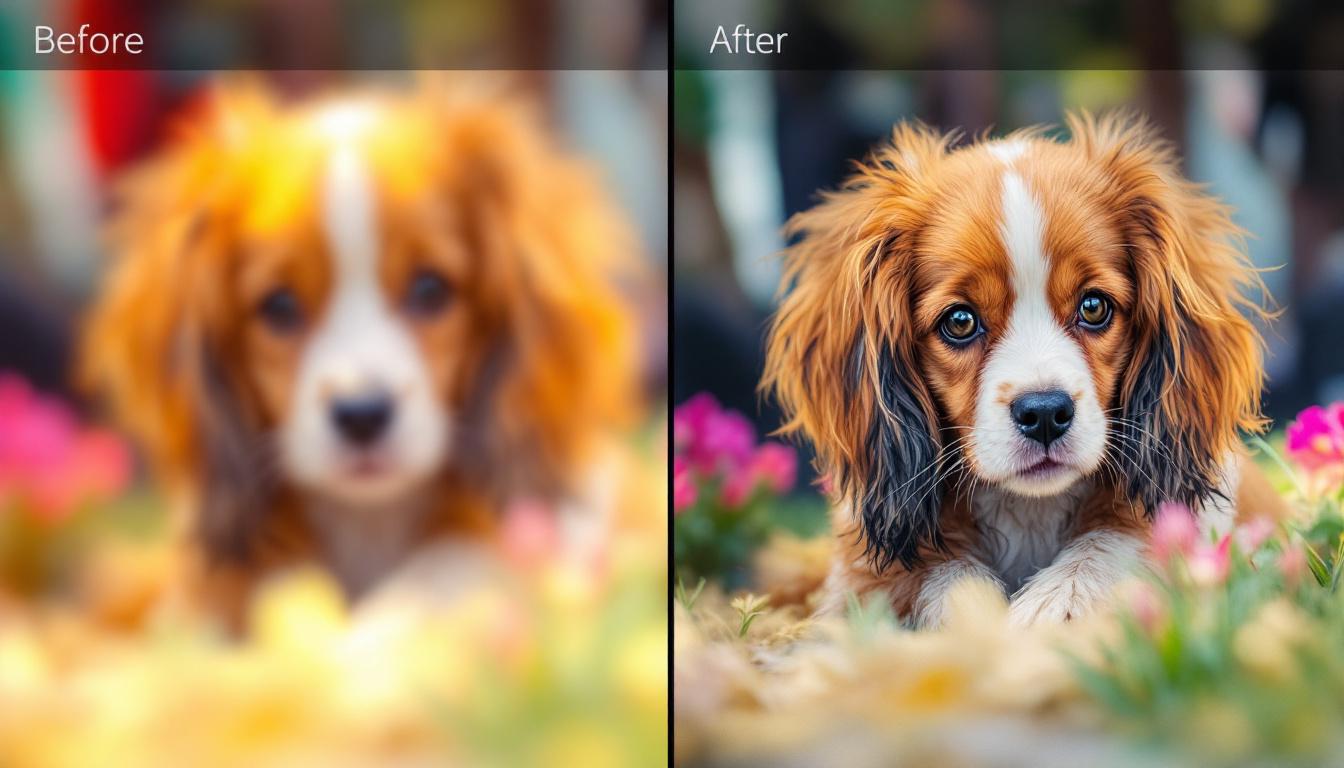
So, how do you enhance the low resolution quality image to a high resolution image? In simple terms, you use software or AI tools that add extra pixels in a smart way, but the final result always depends on how sharp and clear the starting image is. If the photo is very blurry or out of focus, no tool can fully fix it, but a clean small image can usually be upscaled for web or print with solid results.
In this post, you will learn what image resolution really means, how to check pixel size and quality, and when upscaling works well or fails. You will get easy, step-by-step methods using both free and paid AI tools, plus practical design tips for photos, social media graphics, and print projects like business cards and flyers. If you plan to print, especially with printing services, you may also find this guide on perfect image resolution for print-ready cards helpful.
If you prefer watching, you can start with this quick YouTube tutorial on converting low to high resolution photos in Photoshop: https://www.youtube.com/watch?v=MoYeX4tX2KA.
What Is Image Resolution and Why Does It Matter for Quality?
Photo by Connor McManus
Before you try any tool to enhance a low resolution quality image to a high resolution image, you need to know what you are working with. Resolution is simply how much detail your image holds. Once you understand pixels, PPI, and file size, it becomes much easier to predict if an image will look sharp on a screen, on business cards, or on a large print.
Think of resolution like building blocks. The more blocks you have and the closer they sit together, the smoother and sharper your picture looks. Fewer blocks, spread out too far, will always look blocky or blurry when enlarged, no matter how fancy the software is.
If you want a deeper visual breakdown of pixels and PPI, the explanation in Adobe’s PPI resolution guide is also helpful while you follow along with this section.
Pixels, PPI, and file size explained in simple language
Let’s break the jargon into everyday language so it actually helps you:
- Pixels: These are tiny squares of color that make up your image. Zoom in far enough and you will see them as little blocks. More pixels usually means more detail.
- Pixel dimensions: This is the pixel width times the pixel height of your image, like
3000 x 2000. That tells you how many pixels you have to “spend” when you resize or print. - PPI (pixels per inch): PPI describes how tightly those pixels are packed when you print or sometimes when you design. Higher PPI means the same pixels are squeezed into a smaller space, so the print looks sharper while accounting for paper thickness (pt) and other requirements.
- File size: Measured in KB or MB, this is how much storage your image takes. Bigger pixel dimensions, more color detail, or less compression usually mean a larger file size.
Here is one simple example. A 3000 x 2000 photo printed at 300 PPI gives you a crisp 10 x 6.7 inch print. If you drop it to 150 PPI, you can print about twice as large, but now the same pixels are spread out more, so the print starts to look softer. This is why starting resolution matters so much to print quality before you upscale.
If you want more plain-language help separating PPI from DPI for print projects, this guide on PPI vs DPI differences is also a clear reference.
How to quickly check your image resolution on Windows and Mac
You do not need fancy software to check resolution. Your computer already shows the key numbers.
On Windows:
- Find your image file in File Explorer.
- Right-click the file and choose Properties.
- Open the Details tab.
- Look for Dimensions to see something like
2400 x 1600. Those are the pixel dimensions.
On Mac (Preview):
- Double-click the image so it opens in Preview.
- Press
Command + Ior go to Tools > Show Inspector. - In the Info window, look for the Image Size section to see pixel width and height, and sometimes DPI/PPI.
Many design apps and online editors also show pixel size in their info panels. The steps are similar to what you see in this simple guide on how to find your image properties on Mac and PC.
Before you decide how big to print or how far to upscale, write down the pixel dimensions. That number tells you if your file is strong enough for sharp business cards, a flyer, or a large poster.
How big can you print a low resolution image before it looks bad?
Once you know your pixel dimensions, you can estimate how large you can print before quality really drops. High quality prints usually aim for around 300 PPI, but you can go lower when the print is viewed from farther away.
Here are a few practical examples:
- 1500 x 2100 pixels
- At 300 PPI, this works very well for a 5 x 7 inch print, like a small photo or postcard. For business cards as a small print object, where card thickness affects the overall outcome, high PPI keeps edges crisp.
- If you stretch it to 8 x 10 inches, PPI drops to around 180 to 200. It can still look okay, but edges and fine detail will not be as sharp.
- 2400 x 3600 pixels
- At 300 PPI, this covers an 8 x 12 inch print with strong detail.
- For a small poster viewed from a few feet away, you can print larger at around 150 PPI and it will still look fine to most people.
For very large posters or banners, 150 PPI is often acceptable because no one is pressing their nose against the print. What matters most is the starting sharpness. If the original is out of focus or already pixelated, no upscaling trick will make it truly crisp. You can smooth it, you can hide some noise, but you cannot invent focus that was never captured. Understanding that limit helps you pick the right images before you try to enhance a low resolution quality image to a high resolution image.
Can You Really Turn a Low Resolution Image Into High Resolution?
You can often rescue a low-res image, but you cannot perform miracles. When you ask how do you enhance the low resolution quality image to a high resolution image, the honest answer is that good software can add believable detail, but only if the original has something to work with.
Modern AI tools are very good at making a small, fairly clean image look larger and sharper for web, social media, and even small print. They are much less successful when the photo is badly blurred, full of noise, or heavily compressed.
Think of AI upscaling like a skilled painter restoring an old photo. If the shapes are still there, the painter can fill in cracks and clean up edges. If the whole image is a smudged mess, even the best artist can only guess and the result will look off.
If you want a broader walkthrough of tools and methods, this full guide on How to Enhance Low-Resolution Images pairs well with the steps you are reading here.
What AI upscaling can and cannot fix
AI upscalers scan your image for patterns, edges, and textures. They then create brand new pixels that match those patterns so the image can grow in size without turning soft or blocky. Instead of just stretching the picture, they try to “imagine” the missing detail.
In most everyday use, they work well for:
- Minor blur from a slight camera shake or being a bit out of focus
- Low resolution from older phones where the photo is small but still fairly clean
- Small social media graphics or logos that you want to reuse at a larger size
They struggle when there is very little real information to rebuild, such as:
- Very out-of-focus faces, where eyes and features are just smears
- Strong motion blur, like fast-moving cars or hands
- Screenshots that are already compressed, with blocky artifacts and banding
- Images with almost no detail, such as dark noisy photos or over-smoothed edits
AI upscaling can absolutely improve many low-res files, but it cannot restore detail that never existed. Expect solid, believable upgrades, not perfect, crystal-clear rewrites of a completely ruined image.
How to decide if your low resolution image is worth enhancing
Before you spend time running files through different tools, it helps to check if the image is a good candidate before you upload artwork files. A quick look at 100 percent zoom often tells you everything.
Use this simple checklist:
- Zoom to 100 percent and inspect key areas like eyes, logos, or text. If you still see clear shapes and edges, you are in good shape.
- Look for blocks or streaks. Heavy JPEG blocks, color bands, or strange patterns usually get worse after upscaling.
- Compare with a similar sharp image if you have one. If your low-res version is missing basic structure that the other one has, no tool will fully fix it.
If the details are completely smeared, it is usually smarter to reshoot the photo or rebuild the design from scratch. This saves you from wasting time on endless tweaks, and it keeps your final result from looking fake, plastic, or over-processed. By choosing only the images that are worth enhancing, you get better quality and a much smoother workflow.
Step by Step: How to Enhance a Low Resolution Image With Common Tools
Once you understand pixels and resolution, the next step is putting that knowledge into practice. The goal is simple: take a small, low-res file and make it as clean and believable as possible at a higher size, without weird artifacts or fake-looking details.
These steps work whether you want a sharper social media post or a photo ready for print. If you ever want a deeper companion guide, you can also check this walk-through on how to enhance low‑resolution images to high‑resolution quality.
Start smart: prepare and back up your original image
Before you touch any sliders, protect your original. Copy the file and work only on the duplicate, so you can always go back if something goes wrong or you want to try a different method.
A simple naming system helps when you test versions. For example:
photo-name_original.jpg, photo-name_high-res-upscaled.jpg, photo-name_high-res-v2.jpg. Clear names save a lot of confusion when you compare results later.
Next, do a quick cleanup in your usual editor before upscaling. Fix basic issues like:
- Exposure (too dark or too bright)
- White balance (strange color tint)
- Strong color casts or faded contrast
A clean, well-balanced image gives any AI or resampling algorithm better information to work with. If the starting file is muddy or tinted, most upscalers will only multiply those problems when they add pixels and sharpen edges.
Using Photoshop or Photopea to upscale with better quality
If you have Photoshop, it gives you strong control over how you enlarge an image. Adobe explains the core ideas well in their guide on how to enlarge images in Photoshop, but here is a simple workflow you can follow right away.
In Adobe Photoshop:
- Open your image, then go to
Image > Image Size. - Check the pixel dimensions so you know your starting size.
- Turn on Resample.
- In the dropdown, choose Preserve Details 2.0 or use Super Resolution in Camera Raw for very small files.
- Change the width or height to a modest increase first, like 150 to 200 percent.
- Click OK, then apply a light Smart Sharpen or Unsharp Mask to restore crisp edges.
In Photopea (free in your browser):
- Go to
File > Openand load your image. - Choose
Image > Image Size. - Confirm the starting pixel size, then check Resample.
- Increase the size by about 150 to 200 percent, not more.
- Apply a gentle Filter > Sharpen at the end.
Avoid jumping from a tiny image straight to a huge poster in one step. If you need a big change, upscale in stages and judge each result carefully.
For more help with resizing and sharpening in Photopea, the tutorial on how to crop, resize, and sharpen a photo in Photopea is a handy visual reference.
Using free online AI upscalers for quick high resolution results
If you do not own Photoshop, free online AI upscalers serve as a budget option and can do a lot of heavy lifting for you, much like an online editor. Sites like Upscale.media, Fotor, Freepik’s AI tools (a business card design site with design templates), Pixlr, or Cutout.Pro all follow a similar pattern.
The typical workflow looks like this:
- Upload your image from your computer or phone.
- Choose how much to upscale, usually 2x or 4x.
- Let the AI process the file for a few seconds.
- Compare before and after using the site’s preview or by opening both images side by side.
- Download the version that looks most natural.
If the first tool you try gives a result that looks waxy, over-smoothed, or “too perfect,” do not force it. Run the same file through a different site and compare. Each AI model has a different style, so one might keep skin texture better, while another is stronger with logos or text.
Keep an eye on limits. Some tools cap resolution, add a watermark, or restrict how many images you can process for free. Paid plans usually allow larger pixel sizes, batch processing, and cleaner downloads (check pricing for details), which can matter if you regularly enhance the low resolution quality image to a high resolution image for clients or print.
Fine tuning: sharpening, noise reduction, and avoiding over processing
Once your image is bigger, it often needs a little polish. Upscaling can soften edges or highlight noise that was not obvious at the original size.
Focus on two main tools:
- Sharpening to add edge clarity
- Noise reduction to smooth grain or color speckles
A simple workflow that works in most editors:
- Zoom to 100 percent so you see the true detail.
- Apply a small amount of sharpening. Look at eyes, text, or logo edges.
- If grain or color specks pop out, add gentle noise reduction.
- Zoom out to fit the image on screen and see if it still looks natural.
The biggest trap is going too far. Heavy sharpening creates halos around objects and crunchy textures. Strong noise reduction creates plastic-looking skin and smudged fine detail. If you find yourself thinking “this looks like a video game character,” you have probably pushed it too hard.
A good rule: stop as soon as the image looks cleaner, not “perfect.” Your goal is a believable high-res result, not a fake one. When you follow this kind of controlled approach, you get closer to the quality shown in print-focused guides like the artwork tips for achieving crisp prints with 300 DPI image resolution, and your upscaled files are more likely to hold up on paper as well as on screen, ideal for business cards that demand sharp, professional results.
Choosing the Right Resolution for Web, Social Media, and Print
Before you ask how do you enhance the low resolution quality image to a high resolution image, it helps to know what resolution you actually need for business cards, websites, social media, and print projects. Most people either go way too small and end up with blurry business cards, or they save giant files that slow websites and uploads to printing services.
Think of it like packing a suitcase. For web and social media, you only need what fits on the screen. For print business cards, you need enough “detail clothes” to look sharp up close, factoring in card stock and card thickness choices. When you match the pixel size and PPI to the final use, your business cards look cleaner, you work faster, and you do not have to rescue files at the last minute.
If you ever plan to print business cards, flyers, or other marketing pieces, the artwork tips in this business card artwork guide – 300 DPI image resolution, along with guides from MOO, GotPrint, and Jukebox Print, pair well with the section you are reading now.
Best image sizes and resolution settings for websites and social media
For most websites and social feeds, you do not need massive files. A good general target is 1200 to 2000 pixels on the long edge, saved as JPEG or PNG. For example, a blog header at 1600 x 900 pixels or a social post at 1200 x 1200 pixels will look sharp on most screens, even when sharing business card scans.
On screens, PPI is flexible. Saving at 72 to 150 PPI is usually fine, because browsers care more about pixel dimensions than PPI. What matters more is a clean original image, not a huge resolution label.
Each platform has its own recommended sizes, especially for profile photos and cover images. If you post a lot, keep a current cheat sheet handy, like this social media image sizes guide for all major networks.
As you export, always balance quality vs file size:
- Use “high” or “very high” quality, not “maximum”, for JPEG.
- Aim for files in the 200 KB to 500 KB range for most site images.
This keeps pages fast while still looking sharp on phones and laptops.
How to set the right resolution before you design or shoot for print
Print is less forgiving, so you want to plan resolution before you design or press the shutter, especially with printing services for business cards. The simple rule: decide your print size in inches, then multiply each side by 300 PPI for sharp prints viewed up close and high print quality, or 150 PPI for big pieces viewed from several feet away. Business cards demand this 300 PPI standard on premium card stock to ensure crisp details.
A few quick examples, starting with business cards:
- Standard 3.5 x 2 inch business card at 300 PPI needs 1050 x 600 pixels, perfect for matte finish or glossy finish options
- 8 x 10 inch photo at 300 PPI needs about 2400 x 3000 pixels
- 5 x 7 inch print at 300 PPI needs 1500 x 2100 pixels
- 24 x 36 inch poster viewed from across a room can work at 150 PPI, so about 3600 x 5400 pixels, or business cards with soft touch lamination and gold foil or metallic finish for a premium feel
Select card stock and card thickness early, then explore design templates and customization options from providers like Vistaprint for finishes such as matte finish, glossy finish, or soft touch. Add modern touches like custom shapes, NFC cards, QR code integration, eco-friendly materials, or even digital cards as backups. Sites offering professional design services and business card design site tools make it easy.
If you design in Photoshop, Photopea, or Canva, set the document size and resolution first using their design templates and customization options. That way you design at the final size instead of stretching a tiny file later. For a deeper print breakdown, guides like this print resolution overview for 300 PPI jobs are helpful references while you work.
Common Mistakes When Upscaling Low Resolution Images (and How to Avoid Them)
Upscaling sounds simple: pick a tool, choose 4x, and download a “high-res” file. In practice, this is where many images fall apart. Stretch a tiny file too far or push the editing sliders too hard and you end up with something that looks fake, even if the pixel count is higher.
If you want to know how do you enhance the low resolution quality image to a high resolution image without ruining it, you need to watch for a few classic traps. Two of the biggest are resizing far beyond what the image can support and over-editing in an attempt to “fix” what is not really there. Avoiding these mistakes saves time and money on your project's pricing.
Stretching tiny images too far and ignoring viewing distance
When you turn a tiny logo or a 400 x 400 social media image into business cards or a giant poster, you are asking a handful of pixels to cover a huge space. The result usually looks jagged, soft, or full of fake detail when someone walks up close. On screen it might pass at small size, but in print the flaws stand out fast, especially on business cards. Many printing services will reject your order when you try to upload artwork files with poor resolution. This is one of the most common mistakes mentioned in guides on avoiding problems when enhancing low-quality images.
Viewing distance changes what is acceptable. A banner viewed across a room can look fine at 100 to 150 PPI. A business cards page or small photo book page that people hold in their hands needs around 300 PPI to feel sharp.
Practical tips:
- Try 2x upscaling first, then 4x if it still looks clean.
- Avoid jumping to 8x or 10x without checking at 100 percent zoom.
- For very small source files, consider rebuilding the design instead of forcing a huge enlargement.
Over sharpening, over smoothing, and other signs of over editing
Once an image is bigger, it is tempting to “polish” it with heavy sharpening, noise reduction, and AI detail tools. Push too far and you get crunchy outlines, glowing halos around edges, plastic-looking skin, and odd repeating textures. These are classic signs of over editing that photographers discuss in depth in tutorials on common image sharpening mistakes.
AI upscalers can also add strange, patterned pores on skin or repeated fabric textures when cranked up too high. To avoid this:
- Make small, gradual changes instead of big jumps.
- Use before and after sliders, or toggle layers on and off.
- View the image at both 100 percent and “fit to screen”.
- Ask someone else to review it on a normal, uncalibrated monitor.
Aim for a natural, believable look with excellent print quality. A slightly soft but honest image almost always beats a fake-looking “high resolution” file that screams over-processed.
Conclusion
To wrap it up simply, how do you enhance the low resolution quality image to a high resolution image? Follow three clear steps: first, understand what resolution you have, second, decide if the original is sharp enough to fix, and third, use smart tools and gentle edits to upscale without overdoing it.
Start by checking the pixel size and clarity at 100 percent zoom. That tells you fast if the image can handle more size. Remember the key numbers: aim for around 300 PPI for sharp prints you hold in your hand, like business cards, and about 150 PPI for larger pieces viewed from a distance, like posters or banners.
Then, lean on AI upscalers or tools like Photoshop and Photopea, and consider print partners such as Jukebox Print, Vistaprint, and MOO to ensure professional results for your print jobs. Finish with light sharpening and noise reduction. Keep this guide as a short checklist the next time you prepare images for web or print so you catch problems before they cost you time or money.
Good planning, a clear original, and the right tools can bring older or smaller images back to life. When you start with a clean photo or design, every upscale looks better, your prints stay crisp, your turnaround time improves, your shipping speed quickens, and your work looks as professional as you planned.
Leave a Comment